Beginner Guides
![]() Warning! This article is severely outdated and contains information relevant to a much older version of the game.
Warning! This article is severely outdated and contains information relevant to a much older version of the game.
- New player guide and area is at Arete Landing. This article is preserved for archival purposes
Welcome to Anarchy Online! The group of guides found on this page and linked into this page is meant to serve as a guide to your first experiences on the game to help you get oriented with how the game is played and how the different systems work.
Creating a Character
The first step of playing Anarchy Online is to create a character. Official instructions on how to do so is in the chapter about character creation in the online manual. You can have up to eight characters on each server (or dimension) on your account at the same time, and delete characters to make place for new ones. Don't be afraid to experiment a bit.
Each dimension is separate from each other, and because of this, character names can be the same on all dimensions, even if they are different breed, have different looks or profession or belong to different players. Deleting your character on one dimension does not delete it on any other dimension, even if it has same name there. Once deleted, you can use the same name again on the same dimension you deleted it on, as long as no other player is has created a new character using the same name you deleted.
Through this guide we will make an example character to walk you through many of the low level quests and events found early in the game.
Choosing a Breed
The main article on this topic can be found at: Breeds
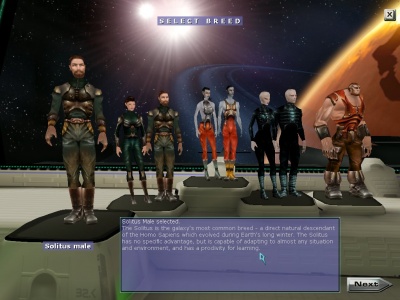
| After starting the character creation process, the first choice you need to decide on is the choice of a breed. A breed is similar to a 'race' in other games, although all the breeds in Anarchy Online come from the same groups of human ancestors, and many are genetically engineered, but they are all essentially 'human'.
The choice of a breed effects several things in game. The first thing it influences is how much each of your base abilities cost. Some breeds favor certain base abilities like Strength or Agility, and have to spend fewer points on improving it; on the other hand, those same advantages come with abilities that are disfavored and are more expensive for characters of that breed to buy. The second thing that breed has an effect on is the amount of health and nano pool a character gets for each point in the skill that controls them. Choice of sex has no influence on game mechanics, females are equivalent to males. Here is a basic overview:
In depth information on Breeds can be found here. When you have decided on a breed and gender for your character by clicking on the model you want, click on the button labeled 'next' While some of the options are very tempting, for this character we are going to go with a Solitus Male to get an even spread of different attributes for what ever profession we choose. |
|
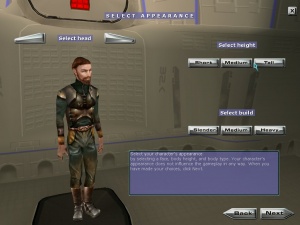
Choosing Appearance
Choosing a Profession
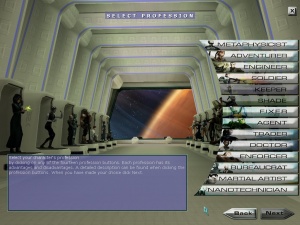
| The choice of a profession is all important in character creation because it determines how much your skills cost, what your list of abilities (defined by your nano programs) will be, and several other features related to the expansions such as Perk sets and Research lines. Some professions are more difficult to play that others due to a combination of cost of equipment or the need for special strategies for playing the character. While more in depth information can be found in the Professions guides, an over view will be give here. When reading through the information given in character creation, remember that many things have changed since the descriptions were written so you may wish to do a little background research before you commit to a profession. There is no harm in experimenting though, and some times that is the best way to find out how a profession plays.
If you have a free account and do not have the Shadowlands expansion the options for Keeper and Shade will be grayed out and unusable. |
|
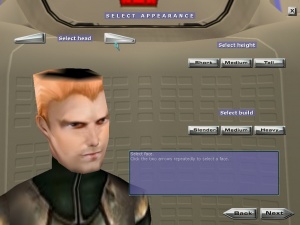
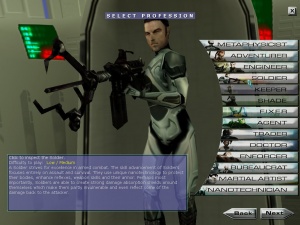
After some thought of either choosing an Enforcer, a Martial Artist, or a Soldier for their combat abilities, we decided that big guns were awesome so we decided to go with a Soldier for our orange haired Solitus.
|
|
Choosing a Name
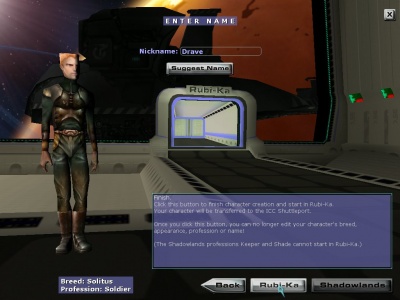
| While the choice of a character name is usually personal, remember that you need a name that isn’t offensive in some way. Additionally, if you want to PvP you might want to use a name that is not based on a profession theme, such as 'Ihealall' for a doc or 'Fullautoshtr' for a soldier, because those names allow people to pick you out very quickly in combat. If you are having trouble finding the name you want, consider adding a number to the end of the name. Once you have a name that you like you can start playing the game. If you are on the core Rubi-Ka Server (RK5), you will arrive at Arete Landing. If you are on the Rubi-Ka 2019 server (RK19) you will start in your faction backyard. |
|
The User Interface
The main article for this topic can be found at: User Interface
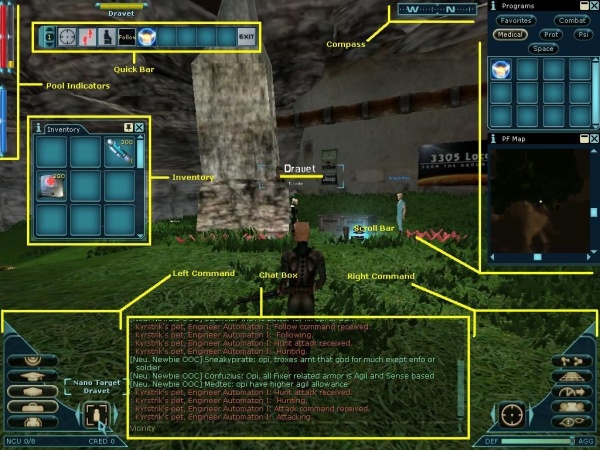
Well now we are in the game, we are ready to kick ass and chew bubble gum but... We should probably take a look at the snazzy hud we have going and explain how some of it works. The User Interface in Anarchy Online is very customizable, not only in the form of new interface 'skins' but also that many of the interface elements can be turned off or moved around with a couple mouse clicks so that everything works how you want it to. We are going to review some of the basic elements of the default interface and how to use it to navigate the world.
Chat Box
The chat box is your main link into all the chat channels of the game, system messages, damage read outs, and news feeds. The default window currently only has a hand full of public channels and all of your combat channels. by default the channel you speak to is the vicinity channel, but you can change that by either clicking on the name of the channel you want to talk to in the window, or when the cursor is in the text bar, pressing 'tab' to bring up a list of channels you can talk to. You may also open a private message box to a play by clicking their name in the chat box.
Some useful shortcuts include:
/v <message> or just / <message> which talks to the vicinity without changing channels.
/t <message> sends a message to your team channel without changing your default channel
/o <message> posts a message on your organization channel without changing your default channel
Shift + R responds to the last private message in the chat bar
Right Command
The right command area is divided up into several parts. The first part is the menu buttons that activate menus and functions. From the top down: NCU (shows what buffs you have running), Maps (gives options for the world map and the Mini-Map), Missions, Faction (if you have the Shadowlands expansion), Team Menu, Friends Menu (which shows your chat friends and people who have recently sent you private messages).
Below the menu buttons is the Agg/Deff Slider which changes how you behave in combat, whether you are more defensive or aggressive. Full Aggressive mode makes you faster, at the expense of your defense, while full defense enhances your evasion skills slightly while slowing down your attacks. The equal point is around 50% that neither favors one or the other.
Next to the menu buttons is the Right Target Control which allows you to change what target you will attack by starting combat (which can be done by pressing Q or pressing the target control button). You can cycle through the targets you can attack by pressing the arrows to the right or left of the target control, or by pressing Tab. Many players find it useful to remove the target control element since its often times easiest to simply use Tab and Q to find targets and start combat.
Left Command
Left Command area is almost a mirror of the right, with a change of menus and information. The menus found on the left are: the Action Menu (which is an extensive menu tree which shows emotes, combat actions, help menus, game setup, and others), Vehicle Menu (if you have the Lost Eden expansion and uses Shift + V as the short cut), Character Menu (Has submenus for Skills, Perks, and Research depending on your expansions), Nano Program Menu (opens in the scroll bar and has all your nano programs), Inventory (opens a free floating menu that has your non-equipment items you are carrying), and the Wear Menu (opens a menu that shows your worn equipment).
The bar under the the menus shows your Total NCU, which is how much space your NCU has to hold buffs with a number reflecting how much is used, and your total amount of credits which is the game currency (you can hold up to 1 billion credits on one character).
The left target control shows who you are targeting for nano programs and abilities that may or may not be combat related. Like the Right, you can scroll through the targets with Tab or the arrows.
Scroll Bar
The Scroll Bar is on the right side of the screen and it is where the vast majority of the menus open to. The scroll bar menus are stacked one, on top of another, and can be scrolled through using the mouse wheel. Alternately they can be closed or minimized to save space. You can undock menus from the scroll bar by right clicking on their name and dragging them into the hud view, and than put them back by right clicking the name again and dropping below the lowest menu in the bar.
Quick Bar
The quick bar allows you to store action, item, nano program, and special ability short cuts to use quickly from the number line. Each position on the bar is number from 1 (first) to 0 (last), with the first number being closest to the number displayed on the quick bar. When you press a number, you will attempt to execute the action placed in that slot. The number on the bar represents the level of the quick bar, and using the arrows you can scroll through the ten different quick bars numbered 1 to 0. You can quickly shift between quick bar levels using Shift + <level #>, so shift + 5 would take you to level 5.
By default there is a start combat action, a sit action, a run toggle action, a follow macro, and a logout action. When you upload new nano programs, a short cut for them will automatically be added to the bar. You can add your own actions by selecting them in the actions menus or Nano Program menu and dragging them to the quick bar. If you want an item to be in the quick bar just pick it up and drop it in a slot, it will stay in your inventory but make a shortcut to the item. To remove actions in the quick bar just click and hold the action and drag it off.
Pool Indicators
These little bars on the left of your screen reflect your various active pools. The red bar is your Health, the blue is your Nano, Yellow your current XP. If you have a green bar it reflects your Alien Experience. You can mouse over the bars to get the numerical total.
Compass
The compass shows you which direction you are facing and marks the direction of your waypoint or active mission objective. These markers show up as orange dots on the compass and you move towards them to find the quest objective or mission entrance. Keep in mind that some quests and missions do not have way points.
Inventory
Your inventory of non-equipped items can be open and closed from the Left Command Area or by pressing I. This menu is free floating and allows to organize the things you have picked up. The inventory holds 30 items or item stacks, regardless of weight or size. If that is not enough space you can get backpacks that open up into 21 more spaces.
The main inventory has some special properties though. All tradeskill operations must be done with the items in slots in the main inventory. Some equipment, such as belt decks and NCU Chips, must be equipped from the main menu and some items will only auto equip by right clicking on the item in the main menu. Additionally, if you have all your main inventory slots full and somehow produce another item in the inventory � such as through a tradeskill, bad trade or from a mission reward � extra items will overflow into a special window. This window can hold an infinite amount of items but all of the items in it will be deleted if you zone and can only be opened by overflowing your inventory. Any item you click on in overflow will try to be transferred to your main inventory.
Transferring to Trade
Holding the Ctrl key and right-clicking the mouse will transfer a stack of items in an inventory (main or backpacks) to the Trade window, if open.
Splitting Item Stacks
Any item marked with (Splittable) in its item description can be split into extra stacks. Holding the Ctrl key and left-clicking an item stack in inventory will pick up a single item from a stack. Clicking an empty place in an inventory will create a new stack of 1 of that item.
It is possible to pick up more than one item. To do so, hold Ctrl and press the left mouse button down. Without releasing it, move the mouse right. An out-of-place number will appear on the mouse cursor, indicating how many items will be picked up from that stack. Moving the mouse left and right will further adjust that number. Releasing the left mouse button will pick up that stack, and it can be placed in another inventory space as before to create a new stack.
Movement and Command Keys
Movement around the game is done in the traditional 'WSAD' manner, but the 'Z' and 'C' key allow you to strafe left and right respectively, while the 'X' key makes the character sit down. A list of available hot keys can be viewed in the game by press F10 and then select the HotKey Tab
| Command Keys | Menu Short Cuts | |
|
|
What Next?
Combat? Adventure? Actually playing the game!? Next, we brave the rigors of the ICC Shuttleport!
