Introduction
|
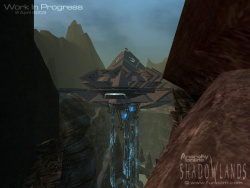
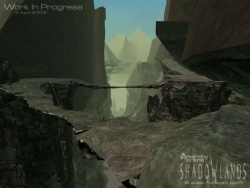
The serene atmosphere of Elysium rapidly changes as one enters into Scheol. Initially it seems to consist of endless highlands, with only meager undergrowth. Rolling hills and mountain ranges stretch on as far as the eye can see, with only sporadic signs of the ancient civilisation around; such as half-collapsed bridges and fallen structures. But these highlands are suddenly cut off by contorted and twisted landscape. The mountains themselves have apparently been wrung and thrown about to form a maze of narrow canyons. Torn and twisted pathways line the walls and descend wildly, spiralling endlessly downwards.
Incredibly strong winds have ripped through these canyons, polishing their walls for millions of years. They have dug ever deeper and carved their way into the abyss. Screaming storms will envelop those treading the precarious ledges and wind-polished stone bridges, and travellers will indeed be lucky to find a level surface to plant their feet on.
|
| In the rubble left by the old civilisation, fanatic loyalists of the Redeemed and the Unredeemed have built bases, even managed to keep some villages intact, and some of the old notum mining machinery is still active, but a bit out of control. Amidst the ruins there are remnants of forgotten and terrible experiments performed by the ancients who tried to trap and contain the souls of their dying brethren.
The Redeemed and Unredeemed minions are not the greatest challenge players will come across in Scheol. These minions are on the defensive against the real threat; the horde of starving and mindless Brink monsters. Creatures that had their last proper meal somewhere around Dawn of Creation, and are eager for some long overdue dessert.
Completing the journey through Scheol will bring players to the Brink, as well as literally underneath the earth itself, where they will come face to face with the timeless, placeless nature of the Shadowlands.
|
|
Runar Thor Thorarinsson
Story & Game Designer
Source
Quests in Scheol
Mini Quest:
Scheol Quests
Special Places
Dyna Camps
Upper Scheol
|
Laki // Keppur // Vinstur
|
|
|
| Mob type: |
Beit
|
| Level: |
120-130
|
| Coordinates: |
1077 x 803 (Wind Top)
1058 x 410 (The Highlands)
1130 x 618 (The Highlands)
|
| Respawn time: |
20 Minuten
|
Drop:
|
Pattern:
|
|
|
|
Boggy // Dirty // Sloughy // Quaggy Girder
|
|
|
| Mob type: |
Girder
|
| Level: |
120-130
|
| Coordinates: |
1395 x 335 (The Temple Bog)
1521 x 164 (The Temple Bog)
1521 x 164 (The Temple Bog)
1521 x 164 (The Temple Bog)
|
| Respawn time: |
20 Minuten
|
Drop:
|
Pattern:
|
|
|
|
Bending // Coiling // Crinkling // Swirling // Twirling Eremite
|
|
|
| Mob type: |
Eremite
|
| Level: |
130
|
| Coordinates: |
985 x 993 (The Highlands)
971 x 1064 (The Highlands)
852 x 1018 (Western Brink)
734 x 878 (Western Brink)
764 x 909 (Western Brink)
758 x 895 (Western Brink)
563 x 918 (Western Brink)
512 x 930 (Western Brink)
574 x 771 (Western Brink)
683 x 826 (Western Brink)
621 x 773 (Western Brink)
543 x 763 (Western Brink)
467 x 653 (Western Brink)
|
| Respawn time: |
20 Minuten
|
Drop:
|
Pattern:
|
|
|
|
Beefy // Gross // Heavy // Obese Spider
|
|
|
| Mob type: |
Spider
|
| Level: |
130
|
| Coordinates: |
1339 x 1018 (Crystal Forest)
1377 x 1077 (Crystal Forest)
1386 x 1030 (Crystal Forest)
1397 x 1055 (Crystal Forest)
|
| Respawn time: |
20 Minuten
|
Drop:
|
Pattern:
|
|
|
|
Nebamun // Webensenu // Nabur // Sa-en-ank // Thapt // Kheferu
|
|
|
| Mob type: |
Croaker
|
| Level: |
120
|
| Coordinates: |
1744 x 935 (Facet Canyon)
1813 x 1037 (Facet Canyon)
1866 x 933 (Facet Canyon)
1930 x 997 (Facet Canyon)
1768x 1038 (Croaker's Pass)
2007 x 1080 (Facet Canyon)
|
| Respawn time: |
20 Minuten
|
Drop:
|
Pattern:
|
|
|
|
Barking // Growling // Snarling // Yapping Chimera
|
|
|
| Mob type: |
Chimera
|
| Level: |
130
|
| Coordinates: |
1306 x 1580 (The Eastern Passageway)
1457 x 1663 (The Eastern Passageway)
1439 x 1813 (The Eastern Passageway)
1443 x 1933 (The Eastern Passageway)
|
| Respawn time: |
20 Minuten
|
Drop:
|
Pattern:
|
|
|
|
Harijay Durjand // Gir Bhavina // Madanda Vishudr // Saunik Ray
|
|
|
| Mob type: |
Rash
|
| Level: |
130
|
| Coordinates: |
1097 x 1750 (The Plunge)
1002 x 1750 (The Plunge)
1001 x 1848 (The Plunge)
1097 x 1847 (The Plunge)
|
| Respawn time: |
20 Minuten
|
Drop:
- For Adonis Access Ring
|
Pattern:
|
|
|
Lower Scheol
|
Haxxor // Roxxor
|
|
|
| Mob type: |
Leet
|
| Level: |
130
|
| Coordinates: |
790 x 1173 (Clutching Light)
792 x 1174 (Clutching Light)
|
| Respawn time: |
20 Minuten
|
Drop:
|
Pattern:
|
|
|
|
Beefy // Gross // Heavy // Obese Spider
|
|
|
| Mob type: |
Spider
|
| Level: |
130
|
| Coordinates: |
291 x 891 (The Twilight Basin)
305 x 959 (The Twilight Basin)
254 x 984 (The Twilight Basin)
392 x 948 (The Twilight Basin)
203 x 1218 (The Twilight Basin)
147 x 1073 (The Twilight Basin)
177 x 1130 (The Twilight Basin)
271 x 1198 (The Twilight Basin)
|
| Respawn time: |
20 Minuten
|
Drop:
|
Pattern:
|
|
|
|
Viram Ravata // Yotidar Baliddh // Nab Vangana // Pusu Omankan
|
|
|
| Mob type: |
Rash
|
| Level: |
130
|
| Coordinates: |
627 x 1422 (Through Earth and Stone)
722 x 1421 (Through Earth and Stone)
721 x 1324 (Through Earth and Stone)
624 x 1324 (Through Earth and Stone)
|
| Respawn time: |
20 Minuten
|
Drop:
|
Pattern:
|
|
|
|
Benacen // Asatix // Atezac // Coah // Caal // Snaamehiel
|
|
|
| Mob type: |
Hiathlin
|
| Level: |
130
|
| Coordinates: |
1337 x 1181 (Halls of Scheol)
1326 x 1191 (Halls of Scheol)
1403 x 1186 (Halls of Scheol)
1440 x 1289 (Halls of Scheol)
1534 x 1268 (Halls of Scheol)
1427 x 1331 (Halls of Scheol)
|
| Respawn time: |
20 Minuten
|
Drop:
|
Pattern:
|
|
|
|
Shadowy Bravado // Shadowy Illusion // Shadowy Deception
|
|
|
| Mob type: |
Shadow
|
| Level: |
130
|
| Coordinates: |
1009 x 1231 (Halls of Scheol)
1041 x 1228 (Halls of Scheol)
1190 x 1498 (Beneath the Beast)
|
| Respawn time: |
20 Minuten
|
Drop:
- For Adonis Access Ring
|
Pattern:
|
|
|
|
Crocked Casuist // Demonic Apparition // Demonic Mirage
|
|
|
| Mob type: |
Demon
|
| Level: |
130
|
| Coordinates: |
1031 x 1279 (Halls of Scheol)
1224 x 1497 (Beneath the Beast)
1212 x 1524 (Beneath the Beast)
1247 x 1527 (Beneath the Beast)
|
| Respawn time: |
20 Minuten
|
Drop:
- For Adonis Access Ring
|
Pattern:
|
|
|
|
Neferu // Tcheser // Shet // Penkha // Sebtitis // Ptahmose
|
|
|
| Mob type: |
Croaker
|
| Level: |
130
|
| Coordinates: |
1658 x 1216 (The Void)
1668 x 1251 (The Void)
1700 x 1246 (The Void)
1722 x 1198 (The Void)
1804 x 1306 (The Void)
1819 x 1383 (The Void)
|
| Respawn time: |
20 Minuten
|
Drop:
|
Pattern:
|
|
|
|
Rigid // Rugged // Solid // Robust Girder
|
|
|
| Mob type: |
Girder
|
| Level: |
120-130
|
| Coordinates: |
1350 x 1482 (The Approach)
1451 x 1460 (The Approach
1468 x 1383 (The Approach)
1334 x 1674 (Necropolis)
|
| Respawn time: |
20 Minuten
|
Drop:
|
Pattern:
|
|
|
|
Oppressing // Harrowing // Dismal // Jejune // Prosy // Pleasant // Gentle // Cordial Soul Dredge
|
|
|
| Mob type: |
Soul Dredge
|
| Level: |
130
|
| Coordinates: |
1472 x 1766 (Necropolis)
1468 x 1729 (Necropolis)
1398 x 1635 (Necropolis)
1310 x 1628 (Necropolis)
1310 x 1628 (Necropolis)
1283 x 1707 (Necropolis)
1260 x 1705 (Necropolis)
1292 x 1727 (Necropolis)
|
| Respawn time: |
20 Minuten
|
Drop:
|
Pattern:
|
|
|
|
Mirthful // Euphoric // Jovial // Plagued // Blah // Tormented // Dolored // Tortured // Gloomy // Listless Spirit
|
|
|
| Mob type: |
Spirit
|
| Level: |
130
|
| Coordinates: |
1332 x 1749 (The Adieu)
1365 x 1789 (The Adieu)
1388 x 1760 (The Adieu)
1513 x 1783 (The Adieu)
1468 x 1729 (The Adieu)
1584x 1754 (The Adieu)
1599 x 1715 (The Adieu)
1595 x1773 (The Adieu)
1329 x 1586 (The Approach)
1461 x 1661 (Necropolis)
|
| Respawn time: |
20 Minuten
|
Drop:
|
Pattern:
|
|
|
|
Noxious // Mephitic Minx
|
|
|
| Mob type: |
Minx
|
| Level: |
130
|
| Coordinates: |
1466 x 1799 (Necropolis)
1447 x 1799 (Necropolis)
|
| Respawn time: |
20 Minuten
|
Drop:
|
Pattern:
|
|
|
|
Rancid // Festering // Pustular // Purulent Imp
|
|
|
| Mob type: |
Demon
|
| Level: |
130
|
| Coordinates: |
1506 x 1815 (The Adieu)
1506 x 1833 (The Adieu)
1518 x 1842 (The Adieu)
1488 x 1841 (The Adieu)
|
| Respawn time: |
20 Minuten
|
Drop:
|
Pattern:
|
|
|
|
Naxos // Lesvos // Kalymnos
|
|
|
| Mob type: |
Golem
|
| Level: |
200 // 210
|
| Coordinates: |
1854 x 1536 (The Void)
1828 x 1578 (The Void)
1736 x 1680 (The Void)
|
| Respawn time: |
25 Minuten
|
Drop:
- For Perennium_Waffen
|
Pattern:
|
|
|
|
Sifnos // Poros
|
|
|
| Mob type: |
Horror
|
| Level: |
200 // 220
|
| Coordinates: |
1790 x 1558 (The Void)
1556x 1772 (The Adieu)
|
| Respawn time: |
25 Minuten
|
Drop:
- For Perennium_Waffen
|
Pattern:
|
|
|
|
Mykonos
|
|
|
| Mob type: |
Demon
|
| Level: |
210
|
| Coordinates: |
1682 x 1711 (The Void)
|
| Respawn time: |
25 Minuten
|
Drop:
- For Perennium_Waffen
|
Pattern:
|
|
|
|
Kefallonia
|
|
|
| Mob type: |
Hydra
|
| Level: |
220
|
| Coordinates: |
1755 x 1850 (The Void)
|
| Respawn time: |
25 Minuten
|
Drop:
- For Perennium_Waffen
|
Pattern:
|
|
|
Dungeons
Scheol Dungeons - aoaquarius.de mirrored site


